
Grouse Grind Trail, The Ultimate Grouse Mountain Hike
The famous Grouse Grind hike is commonly referred to as “Mother Nature’s Stairmaster.” For those of us that have taken this challenging Grouse Mountain hike on the north shore of Vancouver, British Columbia, it is one that will test your fitness level and stamina.
If you have a few days in Vancouver, the “Grind” (as locals like to call it) is a must-do hike. I first hiked the Grouse Grind back in 2003 and used it as part of a fitness and training program.
For fitness buffs, the Grouse Grind in Vancouver can be addictive. After I had completed a few hikes up the Grind, I began to focus on trying to improve my best time. Then, I completed two grinds in one day.
If the Grouse Grind is too challenging, the Coquitlam Crunch is less grueling and hikers can do sections of the trail. It’s a dog-friendly pathway that’s wide, to allow for social distancing and avid runners to pass.
Preparing For The Grouse Grind Trail
The first time I tackled the Grouse Grind, I treated it like training for a 10K or half-marathon. As an avid hiker, I managed fine, but if you’re only used to flat walks, it’s a serious challenge.
What helped me most was running stairs. If you already walk hills regularly, you might be somewhat prepared for this tough Vancouver trail, one of Vancouver best hikes.
Because of the roots, rocks, and endless stairs, good footwear is essential. I recommend trail runners with grip, or better yet, supportive hiking boots to protect your feet and ankles.
Most people take 2 to 2.5 hours to finish it. The course record is just over 25 minutes. Unbelievably, someone broke the record in 2025 by completing 21 grinds in a day. That’s the equilalent of climbing Mount Everest!

Driving Directions To The Grouse Grind
Grouse Mountain is at the end of Capilano Road in North Vancouver, British Columbia. The route passes the famous Suspension Bridge on the way to Grouse Mountain Regional Park. The start of the Grind Trail is located at 6400 Nancy Greene Way, North Vancouver.
There are four pay parking lots – A, B, C, and D. During peak times, it can be a challenge to find a spot. The optimum times are before 9 am, or after 3 pm, to have a better chance of finding a spot. Alternatively, there’s a complimentary shuttle from downtown Vancouver.
Grouse Grind Cost
The Grind trail is complimentary to all hikers. However, if after successfully reaching the top of Guest Services at the Grouse Mountain Chalet, there are only two ways to get back down.
Firstly, the gondola ride provides the easy solution (for CAD 20). Alternatively, hikers can walk down on the BCMC trail (since hiking down the Grind trail is not permitted).

For hikers who do the grind regularly, there a ‘fiver’ pass for CAD 79, for five descent rides. There are also annual tram passes and annual parking passes.
Should You Get A Grouse Mountain Annual Pass?
If you plan to do the grind multiple times during the year, it makes sense to get the Annual Pass. The Regular Pass provides one year (365 days) of unlimited rides on the tram.
The annual pass has perks and discounts, including one complimentary zip line course and one mountain ropes adventure.
Other Trails
The start of the Grouse Grind includes three separate trails, although the Grind is by far the most popular. The chart below shows the Grouse Grind Trail and BCMC Trail Route are very comparable in difficulty, while the Baden Powell Trail is more for novice hikers.

While the Grouse Grind’s 2.5-kilometer trail isn’t the longest, it has the highest elevation gain.
Elevation Of Grouse Grind
The Grouse Grind starts at about 300 meters or 1,000-feet above sea level. With an elevation gain of 800 meters, hikers reach 1,100 meters (3600’) at the top by the peak chalet.
Grouse Mountain’s height is 1,231 meters (4039’). So, those with enough can continue up to the peak of the mountain for an extra challenge.
Before Starting The Grind

The Grouse Grind usually closes in winter due to snow and reopens in spring after maintenance. Summer brings heavy traffic, so the trail gets regular upkeep.
At the trailhead, signage is clear—no dogs, no washrooms, and no trash cans. I always stretch beforehand and drink some water to stay hydrated from the start.
Once you’re climbing, it’s easy to get dehydrated, especially in warmer weather. Conditions can vary—rain makes it muddy, and temps at the top are often much cooler than at the base.
Check the posted hours before starting. They change with the seasons, and it’s best to finish in daylight, especially on your first go. The closing time is typically one and a half hours before sunset.

Tips For Hiking
The following tips are also recommended to ensure you have a good hike:
- Wear suitable hiking footwear – no flip-flops, flimsy runners, or heels. I’ve usually used good runners, but I will be investing in the right hiking boot because as I get older, I like to support my feet and ankles more than when I was younger.
- Take a minimum of 1 liter of drinking water. I had taken just 500ml and ended up rationing it so I didn’t run out of water. That won’t happen again!
- Bring a snack (e.g., nuts, dried fruit). When I did the Grind recently, I hiked without anything to eat but my challenge was more staying hydrated than trying to provide fuel for my body. Do whatever works for you.
- Bring a jacket or sweater – to keep warm if you stop. Although the temperature can drop up to 10 degrees Fahrenheit (6 degrees Celsius) from the bottom to the top, during the summer months a coat is generally not needed.
- Bring a cell phone. This is a good recommendation, but I found there were a few spots where cell coverage was spotty and not reliable. However, the best use for a cell phone is being able to take that “Victory Selfie” when you reach the top!

- Stay on the trail – going off can dislodge rocks that can hurt people below. This is just common sense, but some spots can be dangerous if you go off-trail, and the worse thing that can happen is getting injured because rescue is a challenge.
- If you are hiking near closing time for the trail, consider bringing a small flashlight just in case you are stranded on the Grind.
The Grouse Grind Timer
While Grouse Mountain previously used an app to track times and fastest hikers, the app was discontinued in 2023. For regular grinders, I suggest purchasing a ‘Grind Timer’ card.
The card contains a radio frequency chip that tracks the start and end of each climb. The convenient timer costs CAD 25.
How Dangerous Is The Grouse Grind?
There have been three deaths on the Grouse Grind, and two of them were men over the age of 50 in 2006 and 2010 who died of a heart attack. The 3rd death was a young hiker in 1999 who died in an avalanche while hiking in January.
Obviously, doing the Grind during snowfall is a dangerous thing to do, and why the Grind is officially closed during the winter months.

The North Shore Search and Rescue handle rescues on the Grind. The team handles about 130 rescues annually, and a significant percentage of them involve the Grouse Grind.
The Grind difficulty increases tremendously once daylight is gone. Due to the steepness of sections of the trail, trying to navigate the 2800 steps that make up the Grind can be almost impossible after sunset.
Heavy rainfall or early morning frost makes the trail hazardous too. The wooden steps along the Grind can become treacherous and easily lead to twisted ankles or worse.
What to Expect On The Grouse Grind
Heading out from the entrance of Vancouver’s Grouse Grind, I immediately sensed the fragrance and beauty of the rich forests and trees that make up the trail.

Initially, the Grind starts with relatively level ground and a gradual incline. Don’t misinterpret this leisurely start by thinking the path is easy, and completing it will be no problem. After the first quarter of the hike, the trail becomes quite steep.
When I returned to Grinding after a five-year hiatus, I mistakenly thought somehow it was easier than I remembered. The first 10 to 15 minutes of the trail seemed relatively easy.
However, 10 minutes more and my lungs were burning, my heart rate elevated, and I thought I might collapse. However, by persevering and taking frequent rest stops along the way, I was able to succeed.
Trail Markings
Initially, they had markings only every ¼ segment along the trail. This was quite disheartening.
I remember hiking for what seemed like a very long time, starting to feel exhausted, and when I reached the first quarter marking, I felt defeated and wondered if I could complete the hike?

However, in recent years, they have improved the markings and now have a sign on trees at every 1/40th interval. As a result, you have a lot more indicators of where you are on the trail.
Also, I found it easier to pace myself with quick wins from marker to marker. The additional markers also make it much easier to locate you if you get into trouble and need help.
The rescue team will have a higher chance of reaching you quickly if you indicate that “I’m just past the 7/40th marker,” rather than saying you are “somewhere around the halfway mark.”
Rest Areas
On the Grouse Grind, there are plenty of spots where you can step aside to rest while others pass. Like most trails, the rule is: keep right, pass left. On my last hike, I took around 20 breaks, and I wasn’t alone. Plenty of others were doing the same.
That said, some trail runners fly past like they’re training for Tough Mudder or something even tougher.
The Steepness Of The Grouse Grind

After the ¼ mark along the trail, the steepness of the hike increases dramatically, and the helpful signage suggests checking to ensure you are up for completing the rest of the trail.
It’s important to note that you can turn around and hike down from the first quarter mark if needed. However, after that mark, climbers are not allowed to return to the starting point for safety reasons. From here, it’s a one-way trail and hikers are committed to completing it.
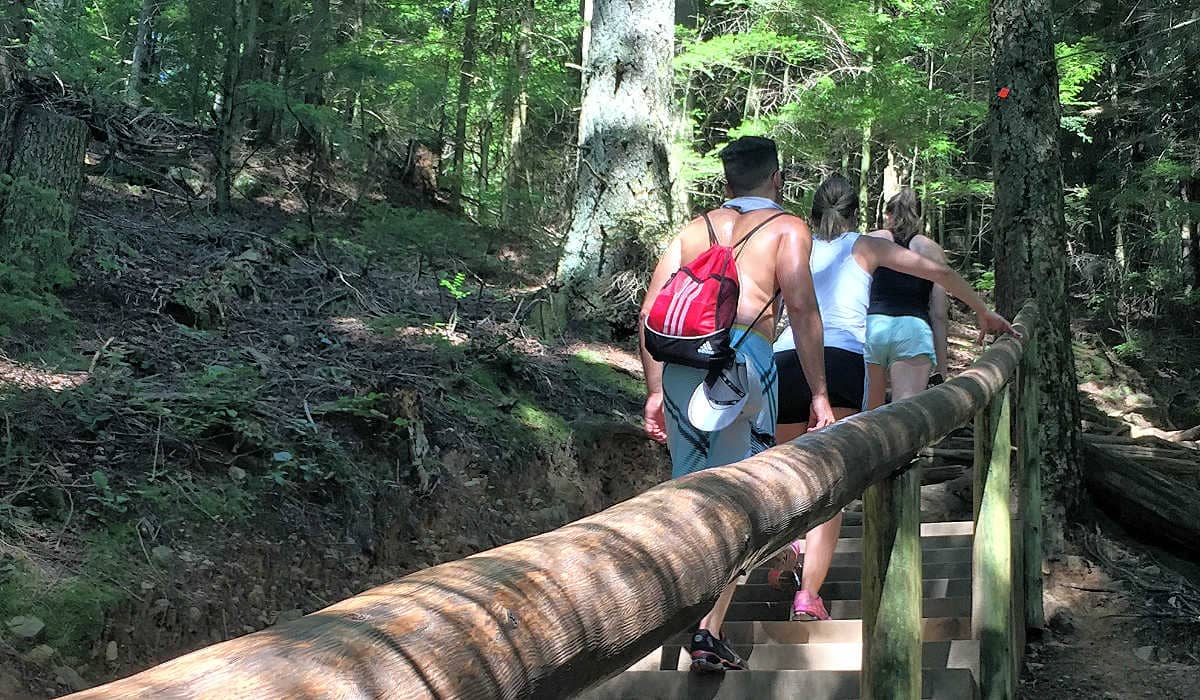
There are sections of the trail that are very steep, but supported by handrails to assist in the climb and navigation.
Congestion Issues
Increasingly, the Grind has become so popular that some days, the high volume of hikers creates congestion on the trail.

With slower and faster hikers jockeying for space, there’s an increased risk of accident or injury.
During my last hike, there was a group of a dozen international travelers hiking the trail, and they would frequently stop during the ascent.
Due to the size of their group, they provided a natural barrier when they stopped. However, even though they were considerate and respectful, it made for a challenge for other hikers to continue past them.
This was especially true in sections that were only wide enough for one or two people at a time.
The Finish

As I neared the top, the trail gets brighter because the trees are thinning, and more sunlight can filter through. There’s a natural feel of excitement and anticipation when you reach the top even though the trail is still quite steep.
Once you make it this far, you can proudly exclaim to yourself, “I Made It!” and it’s the perfect time for a selfie.
If it’s a clear day, take some time to enjoy the spectacular vistas of Vancouver before heading down again. Congratulations, and I hope you enjoyed the trail as much as I did and will try to do it again the next time you are passing through Vancouver. Well done!
